30 KiB
Some of you may have noticed that it’s been a while since my last article. That’s because I’ve become a dad in the meantime, and I’ve had to take a momentary break from my projects to deal with some parental tasks that can’t (yet) be automated.
Or, can they? While we’re probably still a few years away from a robot that can completely take charge of the task of changing your son’s diapers (assuming that enough crazy parents agree to test such a device on their own toddlers), there are some less risky parental duties out there that offer some margin for automation.
One of the first things I’ve come to realize as a father is that infants can really cry a lot, and even if I’m at home I may not always be nearby enough to hear my son’s cries. Commercial baby monitors usually step in to fill that gap and they act as intercoms that let you hear your baby’s sounds even if you’re in another room. But I’ve soon realized that commercial baby monitors are dumber than the ideal device I’d want. They don’t detect your baby’s cries — they simply act like intercoms that take sound from a source to a speaker. It’s up to the parent to move the speaker as they move to different rooms, as they can’t play the sound on any other existing audio infrastructure. They usually come with low-power speakers, and they usually can’t be connected to external speakers — it means that if I’m in another room playing music I may miss my baby’s cries, even if the monitor is in the same room as mine. And most of them work on low-power radio waves, which means that they usually won’t work if the baby is in his/her room and you have to take a short walk down to the basement.
So I’ve come with a specification for a smart baby monitor.
-
It should run on anything as simple and cheap as a RaspberryPi with a cheap USB microphone.
-
It should detect my baby’s cries and notify me (ideally on my phone) when he starts/stops crying, or track the data points on my dashboard, or do any kind of tasks that I’d want to run when my son is crying. It shouldn’t only act as a dumb intercom that delivers sound from a source to one single type of compatible device.
-
It should be able to stream the audio on any device — my own speakers, my smartphone, my computer etc.
-
It should work no matter the distance between the source and the speaker, with no need to move the speaker around the house.
-
It should also come with a camera, so I can either check in real-time how my baby is doing or I can get a picture or a short video feed of the crib when he starts crying to check that everything is alright.
Let’s see how to use our favourite open-source tools to get this job done.
Recording some audio samples
First of all, get a RaspberryPi and flash any compatible Linux OS on an SD card — it’s better to use a RaspberryPi 3 or higher to run the Tensorflow model. Also get a compatible USB microphone — anything will work, really.
Then install the dependencies that we’ll need:
[sudo] apt-get install ffmpeg lame libatlas-base-dev alsa-utils
[sudo] pip3 install tensorflow
As a first step, we’ll have to record enough audio samples where the baby cries and where the baby doesn’t cry that we’ll use later to train the audio detection model. Note: in this example I’ll show how to use sound detection to recognize a baby’s cries, but the same exact procedure can be used to detect any type of sounds — as long as they’re long enough (e.g. an alarm or your neighbour’s drilling) and loud enough over the background noise.
First, take a look at the recognized audio input devices:
arecord -l
On my RaspberryPi I get the following output (note that I have two USB microphones):
**** List of CAPTURE Hardware Devices ****
card 1: Device [USB PnP Sound Device], device 0: USB Audio [USB Audio]
  Subdevices: 0/1
  Subdevice #0: subdevice #0
card 2: Device_1 [USB PnP Sound Device], device 0: USB Audio [USB Audio]
  Subdevices: 0/1
  Subdevice #0: subdevice #0
I want to use the second microphone to record sounds — that’s card 2, device 0. The ALSA way of identifying it is either
hw:2,0 (which accesses the hardware device directly) or plughw:2,0 (which infers sample rate and format conversion
plugins if required). Make sure that you have enough space on your SD card or plug an external USB drive, and then start
recording some audio:
arecord -D plughw:2,0 -c 1 -f cd | lame - audio.mp3
Record a few minutes or hours of audio while your baby is in the same room — preferably with long sessions both of silence, baby cries and other non-related sounds — and Ctrl-C the process when done. Repeat the procedure as many times as you like to get audio samples over different moments of the day or over different days.
Labeling the audio samples
Once you have enough audio samples, it’s time to copy them over to your computer to train the model — either use scp
to copy the files, or copy them directly from the SD card/USB drive.
Let’s store them all under the same directory, e.g. ~/datasets/sound-detect/audio. Also, let’s create a new folder for
each of the samples. Each folder will contain an audio file (named audio.mp3) and a labels file (named labels.json)
that we’ll use to label the negative/positive audio segments in the audio file. So the structure of the raw dataset will
be something like:
~/datasets/sound-detect/audio
  -> sample_1
    -> audio.mp3
    -> labels.json

  -> sample_2
    -> audio.mp3
    -> labels.json

  ...
The boring part comes now: labeling the recorded audio files — and it can be particularly masochistic if they contain
hours of your own baby’s cries. Open each of the dataset audio files either in your favourite audio player or in
Audacity and create a new labels.json file in each of the samples directories. Identify the exact times where the
cries start and where they end, and report them in labels.json as a key-value structure in the
form time_string -> label. Example:
{
  "00:00": "negative",
  "02:13": "positive",
  "04:57": "negative",
  "15:41": "positive",
  "18:24": "negative"
}
In the example above, all the audio segments between 00:00 and 02:12 will be labelled as negative, all the audio segments between 02:13 and 04:56 will be labelled as positive, and so on.
Generating the dataset
Once you have labelled all the audio samples, let’s proceed with generating the dataset that will be fed to the Tensorflow model. I have created a generic library and set of utilities for sound monitoring called micmon. Let’s start with installing it:
git clone https://github.com/BlackLight/micmon.git
cd micmon
[sudo] pip3 install -r requirements.txt
[sudo] python3 setup.py build install
The model is designed to work on frequency samples instead of raw audio. The reason is that, if we want to detect a specific sound, that sound will have a specific “spectral” signature — i.e. a base frequency (or a narrow range where the base frequency may usually fall) and a specific set of harmonics bound to the base frequency by specific ratios. Moreover, the ratios between such frequencies are not affected neither by amplitude (the frequency ratios are constant regardless of the input volume) nor by phase (a continuous sound will have the same spectral signature regardless of when you start recording it). Such an amplitude and time invariant property makes this approach much more likely to train a robust sound detection model compared to the case where we simply feed raw audio samples to a model. Moreover, this model can be simpler (we can easily group frequencies into bins without affecting the performance, thus we can effectively perform dimensional reduction), much lighter (the model will have between 50 and 100 frequency bands as input values, regardless of the sample duration, while one second of raw audio usually contains 44100 data points, and the length of the input increases with the duration of the sample) and less prone to overfit.
micmon provides the logic to calculate the FFT (Fast-Fourier
Transform) of some segments of the audio samples, group the resulting spectrum into bands with low-pass and high-pass
filters and save the result to a set of numpy compressed (.npz) files. You can do it over command-line through the
micmon-datagen command:
micmon-datagen \
    --low 250 --high 2500 --bins 100 \
    --sample-duration 2 --channels 1 \
    ~/datasets/sound-detect/audio \
    ~/datasets/sound-detect/data
In the example above we generate a dataset from raw audio samples stored under ~/dataset/sound-detect/audio and store
the resulting spectral data to ~/datasets/sound-detect/data. --low and --high respectively identify the lowest and
highest frequency to be taken into account in the resulting spectrum. The default values are respectively 20 Hz (lowest
frequency audible to a human ear) and 20 kHz (highest frequency audible to a healthy and young human ear). However, you
may usually want to restrict this range to capture as much as possible of the sound that you want to detect and limit as
much as possible any other type of audio background and unrelated harmonics. I have found in my case that a 250–2500 Hz
range is good enough to detect baby cries. Baby cries are usually high-pitched (consider that the highest note an opera
soprano can reach is around 1000 Hz), and you may usually want to at least double the highest frequency to make sure
that you get enough higher harmonics (the harmonics are the higher frequencies that actually give a timbre, or colour,
to a sound), but not too high to pollute the spectrum with harmonics from other background sounds. I also cut anything
below 250 Hz — a baby’s cry sound probably won’t have much happening on those low frequencies, and including them may
also skew detection. A good approach is to open some positive audio samples in e.g. Audacity or any equalizer/spectrum
analyzer, check which frequencies are dominant in the positive samples and center your dataset around those frequencies.
--bins specifies the number of groups for the frequency space (default: 100). A higher number of bins means a higher
frequency resolution/granularity, but if it’s too high it may make the model prone to overfit.
The script splits the original audio into smaller segments and it calculates the spectral “signature” of each of those
segments. --sample-duration specifies how long each of these segments should be (default: 2 seconds). A higher value
may work better with sounds that last longer, but it’ll decrease the time-to-detection and it’ll probably fail on short
sounds. A lower value may work better with shorter sounds, but the captured segments may not have enough information to
reliably identify the sound if the sound is longer.
An alternative approach to the micmon-datagen script is to make your own script for generating the dataset through the
provided micmon API. Example:
import os

from micmon.audio import AudioDirectory, AudioFile
from micmon.dataset import DatasetWriter

basedir = os.path.expanduser('~/datasets/sound-detect')
audio_dir = os.path.join(basedir, 'audio')
datasets_dir = os.path.join(basedir, 'data')
cutoff_frequencies = [250, 2500]

# Scan the base audio_dir for labelled audio samples
audio_dirs = AudioDirectory.scan(audio_dir)

# Save the spectrum information and labels of the samples to a
# different compressed file for each audio file.
for audio_dir in audio_dirs:
    dataset_file = os.path.join(datasets_dir, os.path.basename(audio_dir.path) + '.npz')
    print(f'Processing audio sample {audio_dir.path}')

    with AudioFile(audio_dir.audio_file, audio_dir.labels_file) as reader, \
            DatasetWriter(dataset_file,
                          low_freq=cutoff_frequencies[0],
                          high_freq=cutoff_frequencies[1]) as writer:
        for sample in reader:
            writer += sample
Whether you used micmon-datagen or the micmon Python API, at the end of the process you should find a bunch of .npz
files under ~/datasets/sound-detect/data, one for each labelled audio file in the original dataset. We can use this
dataset to train our neural network for sound detection.
Training the model
micmon uses Tensorflow+Keras to define and train the model. It can easily be done with the provided Python API.
Example:
import os
from tensorflow.keras import layers

from micmon.dataset import Dataset
from micmon.model import Model

# This is a directory that contains the saved .npz dataset files
datasets_dir = os.path.expanduser('~/datasets/sound-detect/data')

# This is the output directory where the model will be saved
model_dir = os.path.expanduser('~/models/sound-detect')

# This is the number of training epochs for each dataset sample
epochs = 2

# Load the datasets from the compressed files.
# 70% of the data points will be included in the training set,
# 30% of the data points will be included in the evaluation set
# and used to evaluate the performance of the model.
datasets = Dataset.scan(datasets_dir, validation_split=0.3)
labels = ['negative', 'positive']
freq_bins = len(datasets[0].samples[0])

# Create a network with 4 layers (one input layer, two intermediate layers and one output layer).
# The first intermediate layer in this example will have twice the number of units as the number
# of input units, while the second intermediate layer will have 75% of the number of
# input units. We also specify the names for the labels and the low and high frequency range
# used when sampling.
model = Model(
    [
        layers.Input(shape=(freq_bins,)),
        layers.Dense(int(2 * freq_bins), activation='relu'),
        layers.Dense(int(0.75 * freq_bins), activation='relu'),
        layers.Dense(len(labels), activation='softmax'),
    ],
    labels=labels,
    low_freq=datasets[0].low_freq,
    high_freq=datasets[0].high_freq
)

# Train the model
for epoch in range(epochs):
    for i, dataset in enumerate(datasets):
        print(f'[epoch {epoch+1}/{epochs}] [audio sample {i+1}/{len(datasets)}]')
        model.fit(dataset)
        evaluation = model.evaluate(dataset)
        print(f'Validation set loss and accuracy: {evaluation}')

# Save the model
model.save(model_dir, overwrite=True)
After running this script (and after you’re happy with the model’s accuracy) you’ll find your new model saved under
~/models/sound-detect. In my case it was sufficient to collect ~5 hours of sounds from my baby’s room and define a
good frequency range to train a model with >98% accuracy. If you trained this model on your computer, just copy it to
the RaspberryPi and you’re ready for the next step.
Using the model for predictions
Time to make a script that uses the previously trained model on live audio data from the microphone and notifies us when our baby is crying:
import os

from micmon.audio import AudioDevice
from micmon.model import Model

model_dir = os.path.expanduser('~/models/sound-detect')
model = Model.load(model_dir)
audio_system = 'alsa'        # Supported: alsa and pulse
audio_device = 'plughw:2,0'  # Get list of recognized input devices with arecord -l

with AudioDevice(audio_system, device=audio_device) as source:
    for sample in source:
        # Pause recording while we process the frame
        source.pause()
        prediction = model.predict(sample)
        print(prediction)
        # Resume recording
        source.resume()
Run the script on the RaspberryPi and leave it running for a bit — it will print negative if no cries have been
detected over the past 2 seconds and positive otherwise.
There’s not much use however in a script that simply prints a message to the standard output if our baby is crying — we
want to be notified! Let’s use Platypush to cover this part. In this example, we’ll use
the pushbullet integration to send a
message to our mobile when cry is detected. Let’s install Redis (used by Platypush to receive messages) and Platypush
with the HTTP and Pushbullet integrations:
[sudo] apt-get install redis-server
[sudo] systemctl start redis-server.service
[sudo] systemctl enable redis-server.service
[sudo] pip3 install 'platypush[http,pushbullet]'
Install the Pushbullet app on your smartphone and head to https://pushbullet.com to get an API token. Then create a
~/.config/platypush/config.yaml file that enables the HTTP and Pushbullet integrations:
backend.http:
  enabled: True

pushbullet:
  token: YOUR_TOKEN
Now, let’s modify the previous script so that, instead of printing a message to the standard output, it triggers a
CustomEvent that can be captured by a
Platypush hook:
#!/usr/bin/python3

import argparse
import logging
import os
import sys

from platypush import RedisBus
from platypush.message.event.custom import CustomEvent

from micmon.audio import AudioDevice
from micmon.model import Model

logger = logging.getLogger('micmon')


def get_args():
    parser = argparse.ArgumentParser()
    parser.add_argument('model_path', help='Path to the file/directory containing the saved Tensorflow model')
    parser.add_argument('-i', help='Input sound device (e.g. hw:0,1 or default)', required=True, dest='sound_device')
    parser.add_argument('-e', help='Name of the event that should be raised when a positive event occurs', required=True, dest='event_type')
    parser.add_argument('-s', '--sound-server', help='Sound server to be used (available: alsa, pulse)', required=False, default='alsa', dest='sound_server')
    parser.add_argument('-P', '--positive-label', help='Model output label name/index to indicate a positive sample (default: positive)', required=False, default='positive', dest='positive_label')
    parser.add_argument('-N', '--negative-label', help='Model output label name/index to indicate a negative sample (default: negative)', required=False, default='negative', dest='negative_label')
    parser.add_argument('-l', '--sample-duration', help='Length of the FFT audio samples (default: 2 seconds)', required=False, type=float, default=2., dest='sample_duration')
    parser.add_argument('-r', '--sample-rate', help='Sample rate (default: 44100 Hz)', required=False, type=int, default=44100, dest='sample_rate')
    parser.add_argument('-c', '--channels', help='Number of audio recording channels (default: 1)', required=False, type=int, default=1, dest='channels')
    parser.add_argument('-f', '--ffmpeg-bin', help='FFmpeg executable path (default: ffmpeg)', required=False, default='ffmpeg', dest='ffmpeg_bin')
    parser.add_argument('-v', '--verbose', help='Verbose/debug mode', required=False, action='store_true', dest='debug')
    parser.add_argument('-w', '--window-duration', help='Duration of the look-back window (default: 10 seconds)', required=False, type=float, default=10., dest='window_length')
    parser.add_argument('-n', '--positive-samples', help='Number of positive samples detected over the window duration to trigger the event (default: 1)', required=False, type=int, default=1, dest='positive_samples')

    opts, args = parser.parse_known_args(sys.argv[1:])
    return opts


def main():
    args = get_args()
    if args.debug:
        logger.setLevel(logging.DEBUG)

    model_dir = os.path.abspath(os.path.expanduser(args.model_path))
    model = Model.load(model_dir)
    window = []
    cur_prediction = args.negative_label
    bus = RedisBus()

    with AudioDevice(system=args.sound_server,
                     device=args.sound_device,
                     sample_duration=args.sample_duration,
                     sample_rate=args.sample_rate,
                     channels=args.channels,
                     ffmpeg_bin=args.ffmpeg_bin,
                     debug=args.debug) as source:
        for sample in source:
            # Pause recording while we process the frame
            source.pause()
            prediction = model.predict(sample)
            logger.debug(f'Sample prediction: {prediction}')
            has_change = False

            if len(window) < args.window_length:
                window += [prediction]
            else:
                window = window[1:] + [prediction]

            positive_samples = len([pred for pred in window if pred == args.positive_label])
            if args.positive_samples <= positive_samples and \
                    prediction == args.positive_label and \
                    cur_prediction != args.positive_label:
                cur_prediction = args.positive_label
                has_change = True
                logging.info(f'Positive sample threshold detected ({positive_samples}/{len(window)})')
            elif args.positive_samples > positive_samples and \
                    prediction == args.negative_label and \
                    cur_prediction != args.negative_label:
                cur_prediction = args.negative_label
                has_change = True
                logging.info(f'Negative sample threshold detected ({len(window)-positive_samples}/{len(window)})')

            if has_change:
                evt = CustomEvent(subtype=args.event_type, state=prediction)
                bus.post(evt)

            # Resume recording
            source.resume()


if __name__ == '__main__':
    main()
Save the script above as e.g. ~/bin/micmon_detect.py. The script only triggers an event if at least positive_samples
samples are detected over a sliding window of window_length seconds (that’s to reduce the noise caused by prediction
errors or temporary glitches), and it only triggers an event when the current prediction goes from negative to positive
or the other way around. The event is then dispatched to Platypush over the RedisBus. The script should also be
general-purpose enough to work with any sound model (not necessarily that of a crying infant), any positive/negative
labels, any frequency range and any type of output event.
Let’s now create a Platypush hook to react on the event and send a notification to our devices. First, prepare the Platypush scripts directory if it’s not been created already:
mkdir -p ~/.config/platypush/scripts
cd ~/.config/platypush/scripts

# Define the directory as a module
touch __init__.py

# Create a script for the baby-cry events
vi babymonitor.py
Content of babymonitor.py:
from platypush.context import get_plugin
from platypush.event.hook import hook
from platypush.message.event.custom import CustomEvent


@hook(CustomEvent, subtype='baby-cry', state='positive')
def on_baby_cry_start(event, **_):
    pb = get_plugin('pushbullet')
    pb.send_note(title='Baby cry status', body='The baby is crying!')


@hook(CustomEvent, subtype='baby-cry', state='negative')
def on_baby_cry_stop(event, **_):
    pb = get_plugin('pushbullet')
    pb.send_note(title='Baby cry status', body='The baby stopped crying - good job!')
Now create a service file for Platypush if it’s not present already and start/enable the service so it will automatically restart on termination or reboot:
mkdir -p ~/.config/systemd/user

wget -O ~/.config/systemd/user/platypush.service \
    https://git.platypush.tech/platypush/platypush/-/raw/master/examples/systemd/platypush.service

systemctl --user start platypush.service
systemctl --user enable platypush.service
And also create a service file for the baby monitor — e.g. ~/.config/systemd/user/babymonitor.service:
[Unit]
Description=Monitor to detect my baby's cries
After=network.target sound.target

[Service]
ExecStart=/home/pi/bin/micmon_detect.py -i plughw:2,0 -e baby-cry -w 10 -n 2 ~/models/sound-detect
Restart=always
RestartSec=10

[Install]
WantedBy=default.target
This service will start the microphone monitor on the ALSA device plughw:2,0and it will fire a baby-cry event with state=positive if at least 2 positive 2-second samples have been detected over the past 10 seconds and the previous state was negative, and state=negative if less than 2 positive samples were detected over the past 10 seconds and the previous state was positive. We can then start/enable the service:
systemctl --user start babymonitor.service
systemctl --user enable babymonitor.service
Verify that as soon as the baby starts crying you receive a notification on your phone. If you don’t you may other review the labels you applied to your audio samples, the architecture and parameters of your neural network, or the sample length/window/frequency band parameters.
Also, consider that this is a relatively basic example of automation — feel free to spice it up with more automation
tasks. For example, you can send a request to another Platypush device (e.g. in your bedroom or living room) with the
tts plugin to say aloud that the baby is crying. You can also extend the micmon_detect.py script so that the captured
audio samples can also be streamed over HTTP — for example using a Flask wrapper and ffmpeg for the audio conversion.
Another interesting use case is to send data points to your local database when the baby starts/stops crying (you can
refer to my previous article on how to use Platypush+PostgreSQL+Mosquitto+Grafana to create your flexible and
self-managed dashboards): it’s a useful set of data to track when your baby sleeps, is awake or needs feeding. And,
again, monitoring my baby has been the main motivation behind developing micmon, but the exact same procedure can be
used to train and use models to detect any type of sound. Finally, you may consider using a good power bank or a pack of
lithium batteries to make your sound monitor mobile.
Baby camera
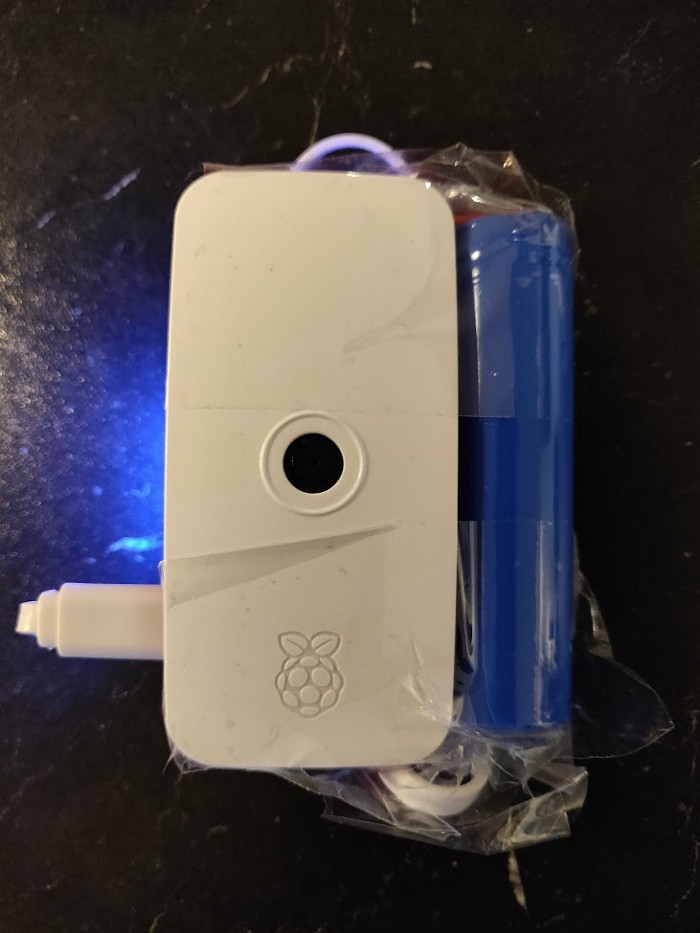
Once you have a good audio feed and a way to detect when a positive audio sequence starts/stops, you may want to add a video feed to keep an eye on your baby. While in my first set up I had mounted a PiCamera on the same RaspberryPi 3 I used for the audio detection, I found this configuration quite unpractical. A RaspberryPi 3 sitting in its case, with an attached pack of batteries and a camera somehow glued on top can be quite bulky if you’re looking for a light camera that you can easily install on a stand or flexible arm and you can move around to keep an eye on your baby wherever he/she is. I have eventually opted for a smaller RaspberryPi Zero with a PiCamera compatible case and a small power bank.
Like on the other device, plug an SD card with a RaspberryPi-compatible OS. Then plug a RaspberryPi-compatible camera in
its slot, make sure that the camera module is enabled in raspi-config and install Platypush with the PiCamera
integration:
[sudo] pip3 install 'platypush[http,camera,picamera]'
Then add the camera configuration in ~/.config/platypush/config.yaml:
camera.pi:
    # Listen port for TCP/H264 video feed
    listen_port: 5001
You can already check this configuration on Platypush restart and get snapshots from the camera over HTTP:
wget http://raspberry-pi:8008/camera/pi/photo.jpg
Or open the video feed in your browser:
http://raspberry-pi:8008/camera/pi/video.mjpg
Or you can create a hook that starts streaming the camera feed over TCP/H264 when the application starts:
mkdir -p ~/.config/platypush/scripts
cd ~/.config/platypush/scripts
touch __init__.py
vi camera.py
Content of camera.py:
from platypush.context import get_plugin
from platypush.event.hook import hook
from platypush.message.event.application import ApplicationStartedEvent


@hook(ApplicationStartedEvent)
def on_application_started(event, **_):
    cam = get_plugin('camera.pi')
    cam.start_streaming()
You will be able to play the feed in e.g. VLC:
vlc tcp/h264://raspberry-pi:5001
Or on your phone either through the VLC app or apps like RPi Camera Viewer.
Audio monitor
The last step is to set up a direct microphone stream from your baby’s RaspberryPi to whichever client you may want to use. The Tensorflow model is good to nudge you when the baby is crying, but we all know that machine learning models aren’t exactly notorious for achieving 100% accuracy. Some time you may simply be sitting in another room and want to hear what’s happening in your baby’s room.
I have made a tool/library for purpose called micstream — it can actually
be used in any situation where you want to set up an audio feed from a microphone over HTTP/mp3. Note: if you use a
microphone to feed audio to the Tensorflow model, then you’ll need another microphone for streaming.
Just clone the repository and install the software (the only dependency is the ffmpeg executable installed on the system):
git clone https://github.com/BlackLight/micstream.git
cd micstream
[sudo] python3 setup.py install
You can get a full list of the available options with micstream --help. For example, if you want to set up streaming
on the 3rd audio input device (use arecord -l to get the full list), on the /baby.mp3 endpoint, listening on port
8088 and with 96 kbps bitrate, then the command will be:
micstream -i plughw:3,0 -e '/baby.mp3' -b 96 -p 8088
You can now simply open http://your-rpi:8088/baby.mp3 from any browser or audio player and you’ll have a real-time
audio feed from the baby monitor.