Snyk has created this PR to upgrade vue-router from 4.1.2 to 4.2.3. See this package in npm: https://www.npmjs.com/package/vue-router See this project in Snyk: https://app.snyk.io/org/blacklight/project/96bfd125-5816-4d9e-83c6-94d1569ab0f1?utm_source=github&utm_medium=referral&page=upgrade-pr |
||
|---|---|---|
| assets | ||
| bin | ||
| docs | ||
| examples | ||
| platypush | ||
| tests | ||
| .drone.yml | ||
| .gitignore | ||
| .gitmodules | ||
| .pre-commit-config.yaml | ||
| CHANGELOG.md | ||
| CONTRIBUTING.md | ||
| generate_missing_docs.py | ||
| LICENSE.txt | ||
| MANIFEST.in | ||
| pyproject.toml | ||
| README.md | ||
| requirements-tests.txt | ||
| requirements.txt | ||
| setup.cfg | ||
| setup.py | ||
Platypush
- Useful links
- Introduction
- Installation
- Architecture
- Mobile app
- Tests
- Funding
Useful links
-
Recommended read: Getting started with Platypush.
-
The blog is a good place to get more insights and inspiration on what you can build.
-
The wiki also contains many resources on getting started.
-
Extensive documentation for all the available integrations and messages is available.
-
If you have issues/feature requests/enhancements please create an issue.
-
A Matrix instance is available if you are looking for interactive support.
-
A Lemmy instance is available for general questions.
Introduction
Platypush is a general-purpose extensible platform for automation across multiple services and devices.
It enables users to create their own self-hosted pieces of automation based on events (if this happens then do that) and it provides a comprehensive and customizable user interface that collects everything you need to visualize and control under one roof.
It takes some concepts from IFTTT, Tasker, Microsoft Flow and Home Assistant to provide an environment where the user can easily connect things together.
It's built with compatibility and flexibility in mind, and it can easily run on any device that can run a Python interpreter - from a Raspberry Pi zero, to an old smartphone, to a beefy server.
What it can do
You can use Platypush to do things like:
- Control your smart home lights
- Control your music and synchronize it to multiple devices
- Create custom and privacy-secure voice assistants that run custom hooks on your phrases
- Build integrations between sensors, cameras, microphones and machine learning models to create smart pieces of automation for e.g. people detection or sound detection
- Get events from your Google or Facebook calendars
- Read data from your sensors and trigger custom events whenever they go above or below some custom thresholds
- Control and automate a self-built robot
- Deliver automated newsletters from custom RSS digests
- Synchronize the clipboards on your devices
- Control your smart switches
- Implement automated custom text-to-speech routines
- Build any kind of interactions and automation routines with your Android device using Tasker
- Play local videos, YouTube videos and torrent media from any device and service, to any device
- Get weather forecast events for your location and build automation routines on them
- Create a custom single hub for Zigbee and Z-Wave smart devices
- Build your own web dashboard with calendar, weather, news and music controls (basically, anything that has a Platypush web widget)
- ...and much more (basically, anything that comes with a Platypush plugin)
Installation
System installation
Platypush uses Redis to deliver and store requests and temporary messages:
# Example for Debian-based distributions
[sudo] apt-get install redis-server

# Enable and start the service
[sudo] systemctl enable redis
[sudo] systemctl start redis
Install through pip
[sudo] pip3 install platypush
Install through a system package manager
Note: currently only Arch Linux and derived distributions are supported.
You can either install the
platypush package (for the
latest stable version) or the
platypush-git package
(for the latest git version) through your favourite AUR package manager. For
example, using yay:
yay platypush
# Or
yay platypush-git
The Arch Linux packages on AUR are automatically updated upon new git commits or tags.
Install from sources
git clone https://git.platypush.tech/platypush/platypush.git
cd platypush
[sudo] pip install .
# Or
[sudo] python3 setup.py install
Installing the dependencies for your extensions
After installing the base platform, you may want to check the dependencies and configuration required by the extensions that you wish to use. There are a few ways to check the dependencies required by an extension:
Install via extras name
All the extensions that require extra dependencies are listed in the
extras_require section under
setup.py.
Install via manifest.yaml
All the plugins and backends have a manifest.yaml file in their source folder.
Any extra dependencies are listed there
If you followed the extras or manifest.yaml way to discover the
dependencies, then you can install them in two ways:
pipinstallation:
[sudo] pip3 install 'platypush[extra1,extra2,extra3]'
- Sources installation:
cd $DIR_TO_PLATYPUSH
[sudo] pip3 install '.[extra1,extra2,extra3]'
Check the instructions reported in the documentation
If you follow this route then simply run the commands listed in the plugin/backend documentation to get the dependencies installed.
After installing the dependencies, create a configuration file under
~/.config/platypush/config.yaml (the application can load the configuration
from another location through the -c option) containing the configuration of
the backend and plugins that you want to use, and add any hooks and procedures
for your use case.
You can then start the service by simply running:
platypush
It's advised to run it as a systemd service though - simply copy the provided
.service
file
to ~/.config/systemd/user, check if the path of platypush matches the path
where it's installed on your system, and start the service via systemctl:
systemctl --user start platypush
Virtual environment installation
Platypush provides a script named platyvenv that can parse a config.yaml
and automatically create a virtual environment (under
~/.local/share/platypush/venv/<device_id>) with all the dependencies required
by the configured integrations.
-
Create the environment from a configuration file:
platyvenv build -c /path/to/config.yaml -
Start the service from the virtual environment:
# device_id matches either the hostname or the device_id in config.yaml platyvenv start device_id -
Stop the instance:
platyvenv stop device_id -
Remove the instance:
platyvenv rm device_id
Docker installation
You can also install Platypush in a container - the application provides a
script named platydock that automatically creates a container instance from a
config.yaml:
-
Create the container from a configuration file:
platydock build -c /path/to/config.yaml -
Start the container:
# device_id matches either the hostname or the device_id in config.yaml platydock start device_id -
Stop the instance:
platydock stop device_id -
Remove the instance:
platydock rm device_id
Note that both the virtual environment and Docker container option offer the
possibility to include extra YAML configuration files in the main config.yaml
through the include directive (as long as they are in the same folder as the
main config.yaml), as well as external Python scripts in a scripts
directory in the same folder as the config.yaml.
Architecture
The architecture of Platypush consists of a few simple pieces, orchestrated by
a configuration file stored by default under
~/.config/platypush/config.yaml:
Plugins
Plugins are integrations that do things - like modify files, train and evaluate machine learning models, control cameras, read sensors, parse a web page, control lights, send emails, control Chromecasts, run voice queries, handle torrent transfers or control Zigbee or Z-Wave devices.
The configuration of a plugin matches one-on-one that of its documented class constructor, so it's very straightforward to write a configuration for a plugin by reading its documentation:
light.hue:
  # Groups that will be controlled by default
  groups:
    - Living Room
    - Hall
Actions
Plugins expose actions, that match one-on-one the plugin class methods
denoted by @action, so it's very straightforward to invoke plugin actions by
just reading the plugin documentation. They can be invoked directly from your
own scripts or they can be sent to the platform through any supported channel
as simple JSON messages:
{
  "type": "request",
  "action": "light.hue.on",
  "args": {
    "lights": ["Entrance Bulb"]
  }
}
Backends
They are background services that listen for messages on channels (like an HTTP backend, an MQTT instance, a Kafka instance, Pushbullet etc.).
If a backend supports the execution of requests (e.g. HTTP, MQTT, Kafka, Websocket and TCP) then you can send requests to these services in JSON format. For example, in the case of the HTTP backend:
# Get a token
curl -XPOST -H 'Content-Type: application/json' -d '
{
  "username": "$YOUR_USER",
  "password": "$YOUR_PASSWORD"
}' http://host:8008/auth

# Execute a request
curl -XPOST -H 'Content-Type: application/json' \
    -H "Authorization: Bearer $YOUR_TOKEN" -d '
{
  "type": "request",
  "action": "tts.say",
  "args": {
    "text": "This is a test"
  }
}' http://host:8008/execute
Events
When a certain event occurs (e.g. a JSON request is received, or a Bluetooth device is connected, or a Flic button is pressed, or some speech is detected on the voice assistant service, or an RSS feed has new items, or a new email is received, or a new track is played, or an NFC tag is detected, or new sensor data is available, or a value of a Zigbee device changes, etc.), the associated backend will trigger an event.
Hooks
Event hooks are custom pieces of logic that will be run when a certain event is triggered. Hooks are the glue that connects events to actions, exposing a paradigm similar to IFTTT (if a certain event happens then run these actions). They can declared as:
- Sections of the
config.yaml. Example:
event.hook.SearchSongVoiceCommand:
  if:
    type: platypush.message.event.assistant.SpeechRecognizedEvent
    phrase: "play ${title} by ${artist}"
  then:
    - action: music.mpd.clear
    - action: music.mpd.search
      args:
        filter:
          artist: ${artist}
          title: ${title}

    - if ${len(output)}:
      - action: music.mpd.play
        args:
          resource: ${output[0]['file']}
- Stand-alone Python scripts stored under
~/.config/platypush/scriptsand will be dynamically imported at start time. Example:
from platypush.event.hook import hook
from platypush.utils import run
from platypush.message.event.assistant import SpeechRecognizedEvent

@hook(SpeechRecognizedEvent, phrase='play ${title} by ${artist}')
def on_music_play_command(event, title=None, artist=None, **context):
  results = run('music.mpd.search', filter={
    'artist': artist,
    'title': title,
  })

  if results:
    run('music.mpd.play', results[0]['file'])
More complex filters
Your event hooks can include more complex filters too. Structured filters against partial event arguments are also possible, and relational operators are supported as well. For example:
from platypush.event.hook import hook
from platypush.message.event.sensor import SensorDataChangeEvent

@hook(SensorDataChangeEvent, data=1):
def hook_1(event):
    """
    Triggered when event.data == 1
    """

@hook(SensorDataChangeEvent, data={'state': 1}):
def hook_2(event):
    """
    Triggered when event.data['state'] == 1
    """

@hook(SensorDataChangeEvent, data={
  'temperature': {'$gt': 25},
  'humidity': {'$le': 15}
}):
def hook_3(event):
    """
    Triggered when event.data['temperature'] > 25 and
    event.data['humidity'] <= 15.
    """
The supported relational fields are the same supported by ElasticSearch - $gt
for greater than, $lt for lesser than, $ge for greater or equal, $ne for
not equal, etc.
Procedures
Procedures are pieces of custom logic that can be executed as atomic actions
using procedure.<name> as an action name.
They can be defined either in the config.yaml or as Python scripts stored
under ~/.config/platypush/scripts - provided that the procedure is also
imported in ~/.config/platypush/scripts/__init__.py so it can be discovered
by the service.
YAML example for a procedure that can be executed when we arrive home and turns on the lights if the luminosity is lower that a certain thresholds, says a welcome home message using the TTS engine and starts playing the music:
procedure.at_home:
    # Get luminosity data from a sensor - e.g. LTR559
    - action: gpio.sensor.ltr559.get_data

    # If it's lower than a certain threshold, turn on the lights
    - if ${int(light or 0) < 110}:
        - action: light.hue.on

    # Say a welcome home message
    - action: tts.google.say
      args:
        text: Welcome home

    # Play the music
    - action: music.mpd.play
Python example:
# Content of ~/.config/platypush/scripts/home.py
from platypush.procedure import procedure
from platypush.utils import run

@procedure
def at_home(**context):
  sensor_data = run('gpio.sensor.ltr559.get_data')
  if sensor_data['light'] < 110:
    run('light.hue.on')

  run('tts.google.say', text='Welcome home')
  run('music.mpd.play')
In either case, you can easily trigger the at-home procedure by sending an action request message to a backend - for example, over the HTTP backend:
curl -XPOST -H 'Content-Type: application/json' \
    -H "Authorization: Bearer $YOUR_TOKEN" -d '
{
  "type": "request",
  "action": "procedure.at_home"
}' http://host:8008/execute
Cronjobs
Cronjobs are pieces of logic that will be run at regular intervals, expressed
in crontab-compatible syntax. They can be defined either in the config.yaml
or as Python scripts stored under ~/.config/platypush/scripts as functions
labelled by the @cron decorator.
Note that seconds are also supported (unlike the standard crontab definition),
but, for back-compatibility with the standard crontab format, they are at the
end of the cron expression, so the expression is actually in the format
<minute> <hour> <day_of_month> <month> <day_of_week> <second>.
YAML example for a cronjob that is executed every 30 seconds and checks if a Bluetooth device is nearby:
cron.check_bt_device:
  cron_expression: '* * * * * */30'
  actions:
    - action: bluetooth.lookup_name
      args:
        addr: XX:XX:XX:XX:XX:XX

    - if ${name}:
        - action: procedure.on_device_on
    - else:
        - action: procedure.on_device_off
Python example:
# Content of ~/.config/platypush/scripts/bt_cron.py
from platypush.cron import cron
from platypush.utils import run

@cron('* * * * * */30')
def check_bt_device(**context):
  name = run('bluetooth.lookup_name').get('name')
  if name:
    # on_device_on logic here
  else:
    # on_device_off logic here
Entities
Entities are a fundamental building block of Platypush. Most of the integrations will store their state or connected devices in the form of entities - e.g. the sensors detected by the Z-Wave/Zigbee/Bluetooth integration, or the lights connected to a Hue bridge, or your cloud nodes, or your custom Arduino/ESP machinery, and so on.
Entities provide a consistent interface to interact with your integrations regardless of their type and the plugin that handles them. For instance, all temperature sensors will expose the same interface, regardless if they are Bluetooth or Zigbee sensors, and all the media plugins will expose the same interface, regardless if they manage Chromecasts, Kodi, Plex, Jellyfin or a local VLC player.
Once you enable the HTTP backend and a few integrations that export entities and register a user, you can query the detected entities via:
curl -XPOST -H 'Content-Type: application/json' \
    -H "Authorization: Bearer $YOUR_TOKEN" \
    -d '{"type":"request", "action":"entities.get"}' \
    http://localhost:8008/execute
All the entities expose the same interface and can be manipulated through the
same API. Also, when an entity is updated it always emits an
EntityUpdateEvent,
so you can easily create hooks that react to these events and act on multiple
types of entities.
The web interface
If
backend.http
is enabled then a web interface will be provided by default on
http://host:8008/. Besides using the /execute endpoint for running
requests, the built-in web server also provides a full-featured interface that
groups together the controls for most of the plugins - e.g. sensors, switches,
music controls and search, media library and torrent management, lights,
Zigbee/Z-Wave devices and so on. The UI is responsive and mobile-friendly.
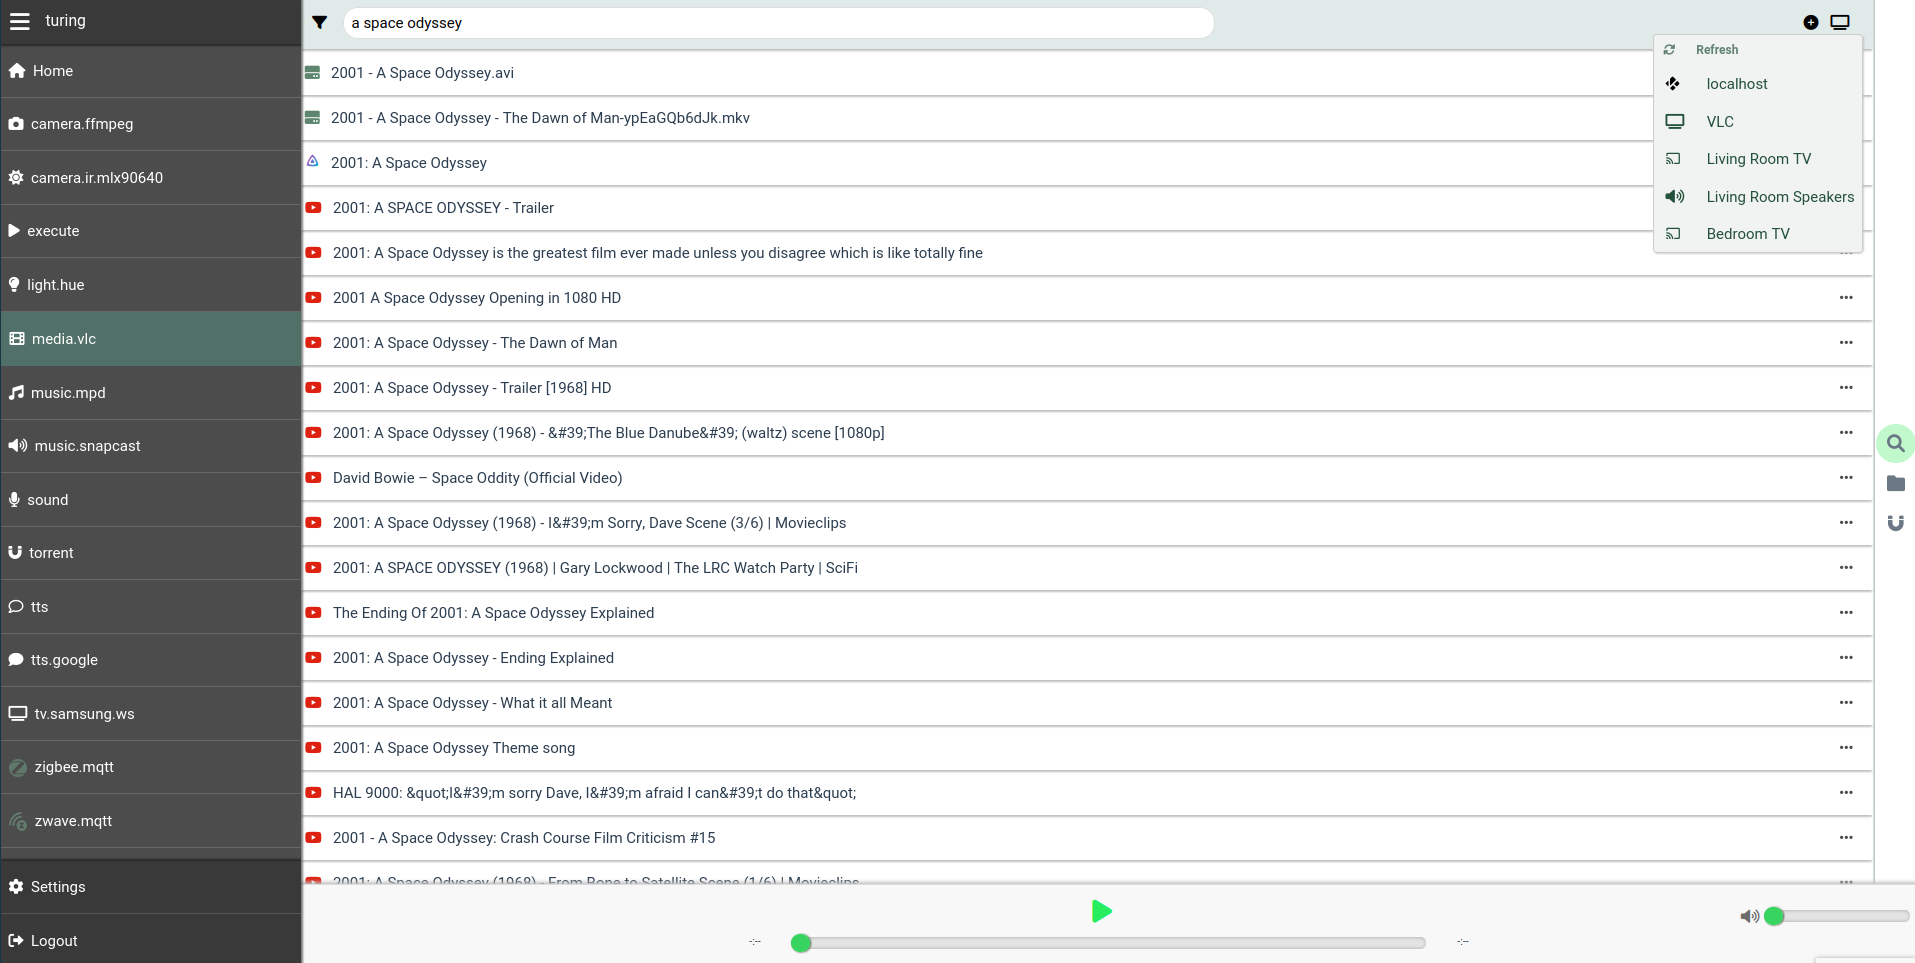
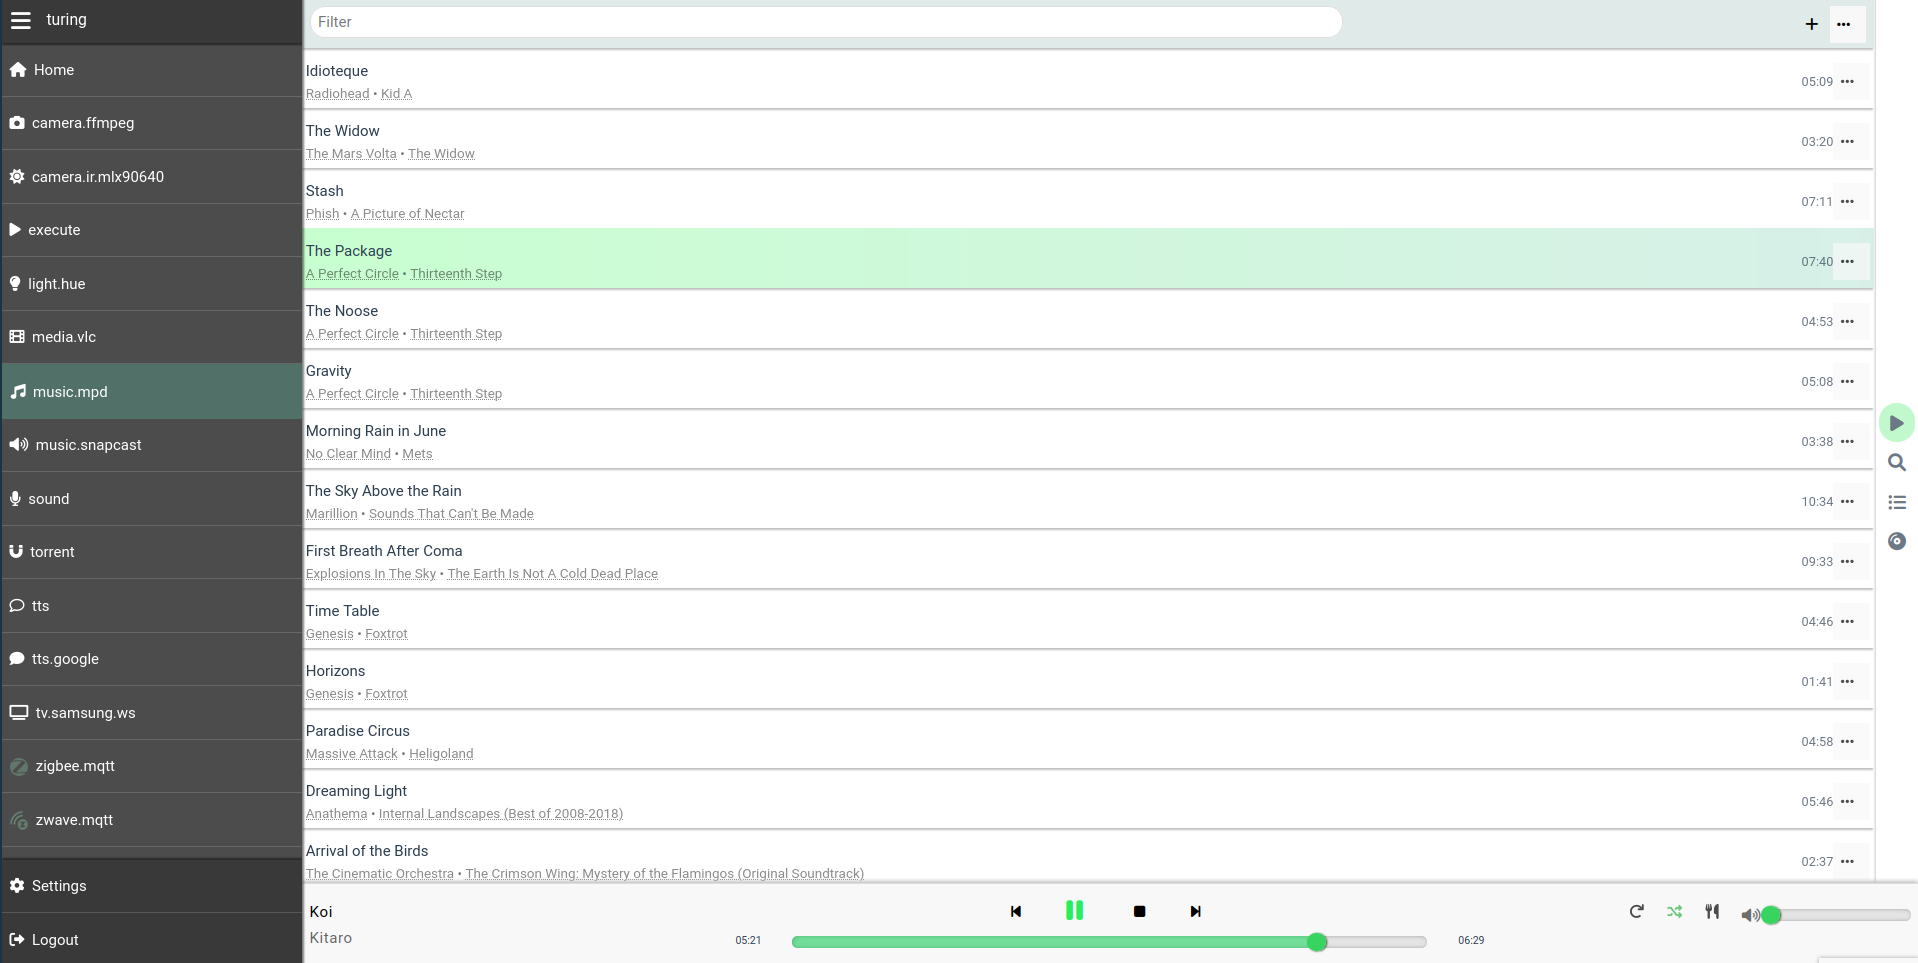
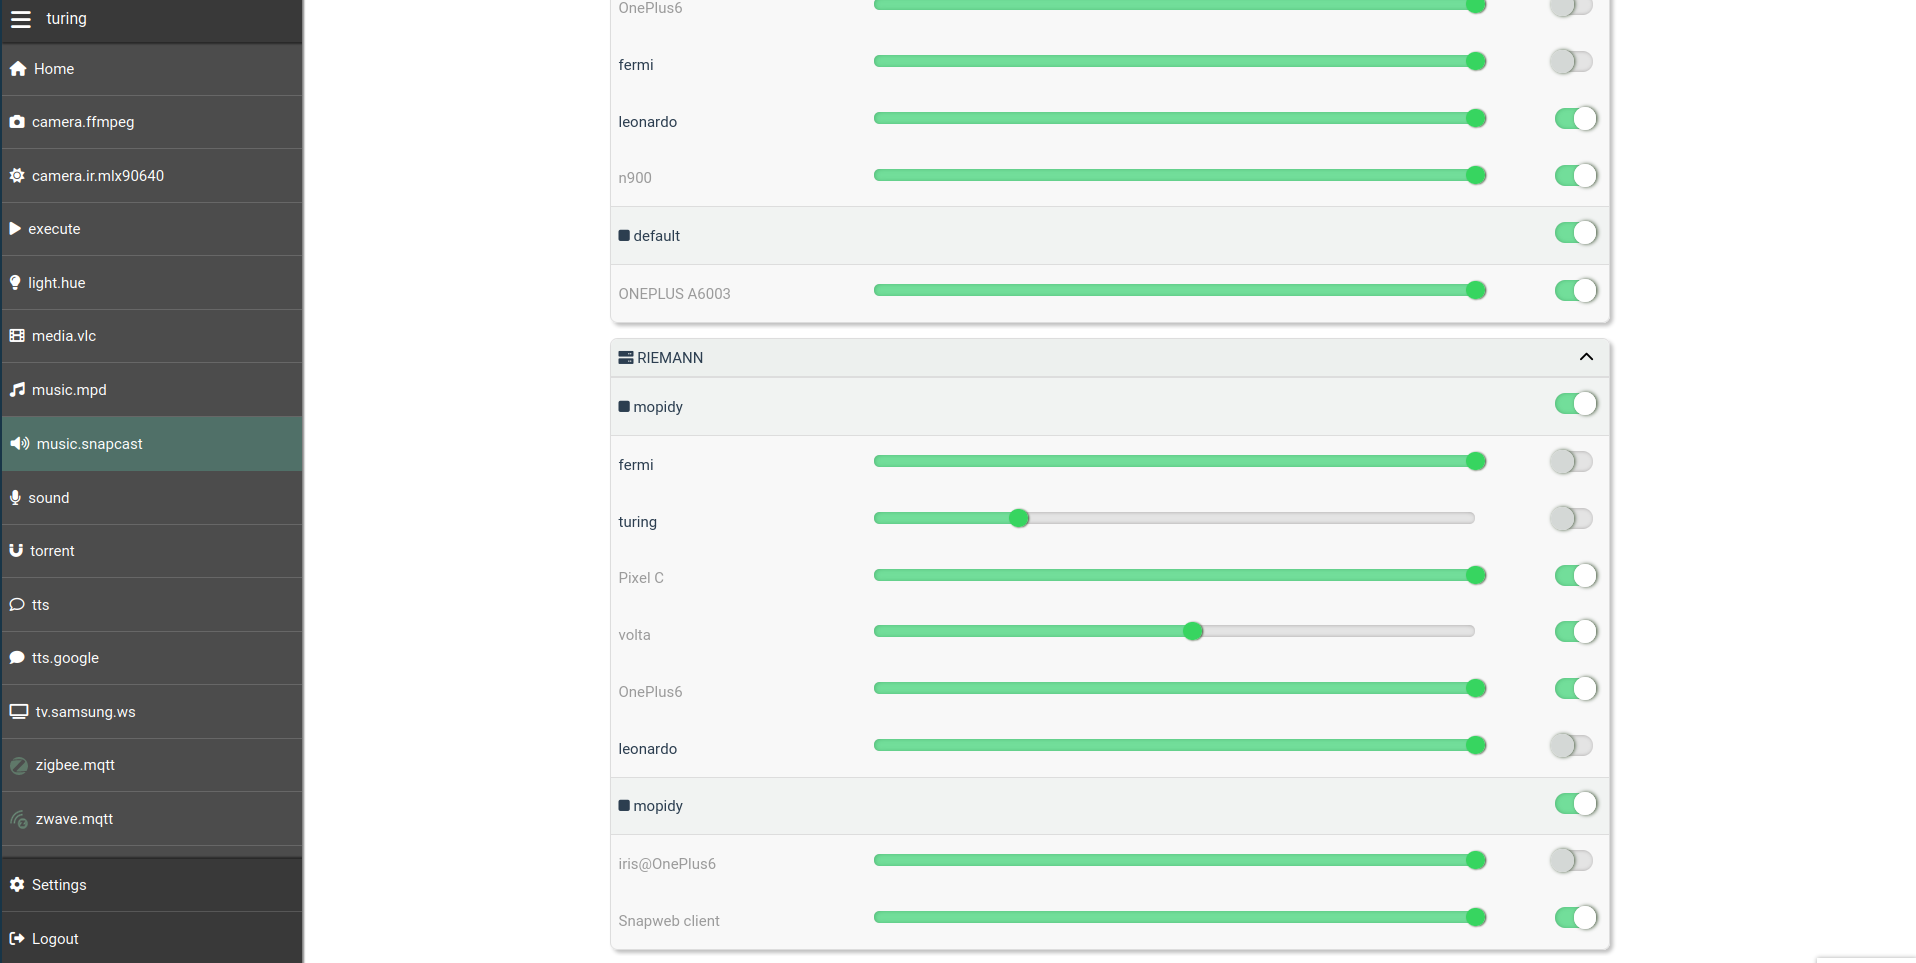
Some screenshots:
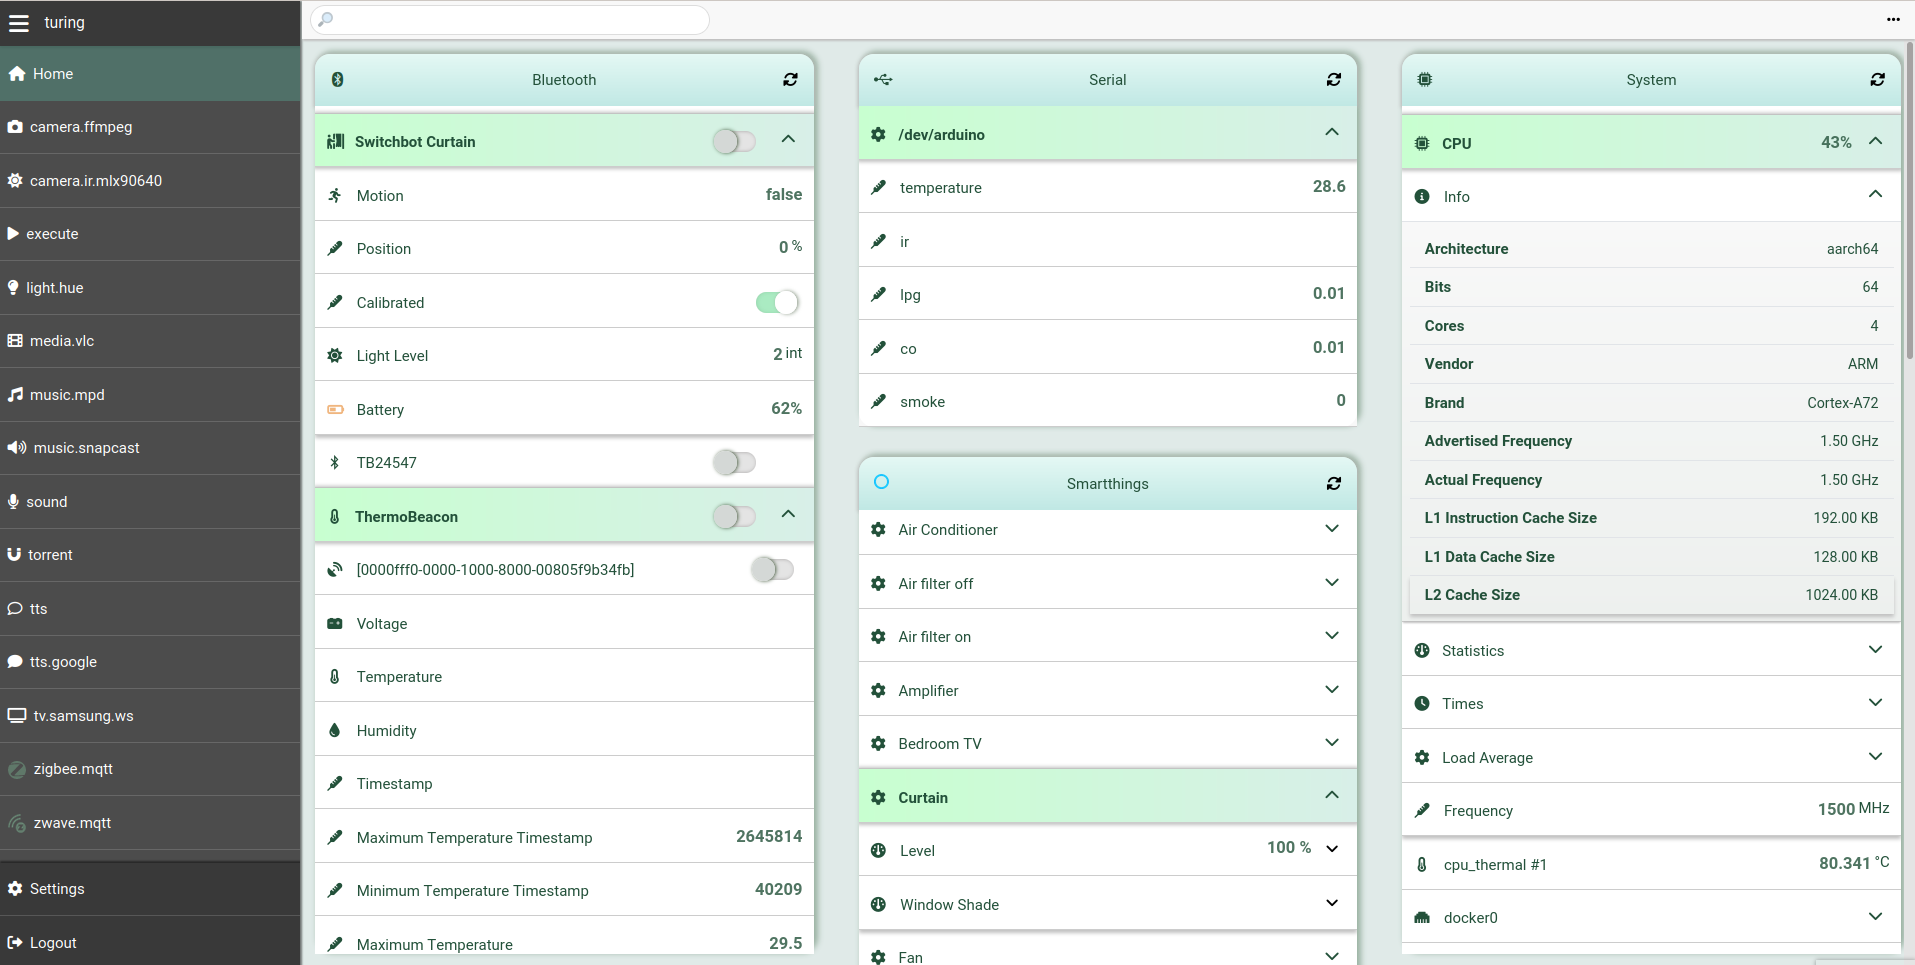
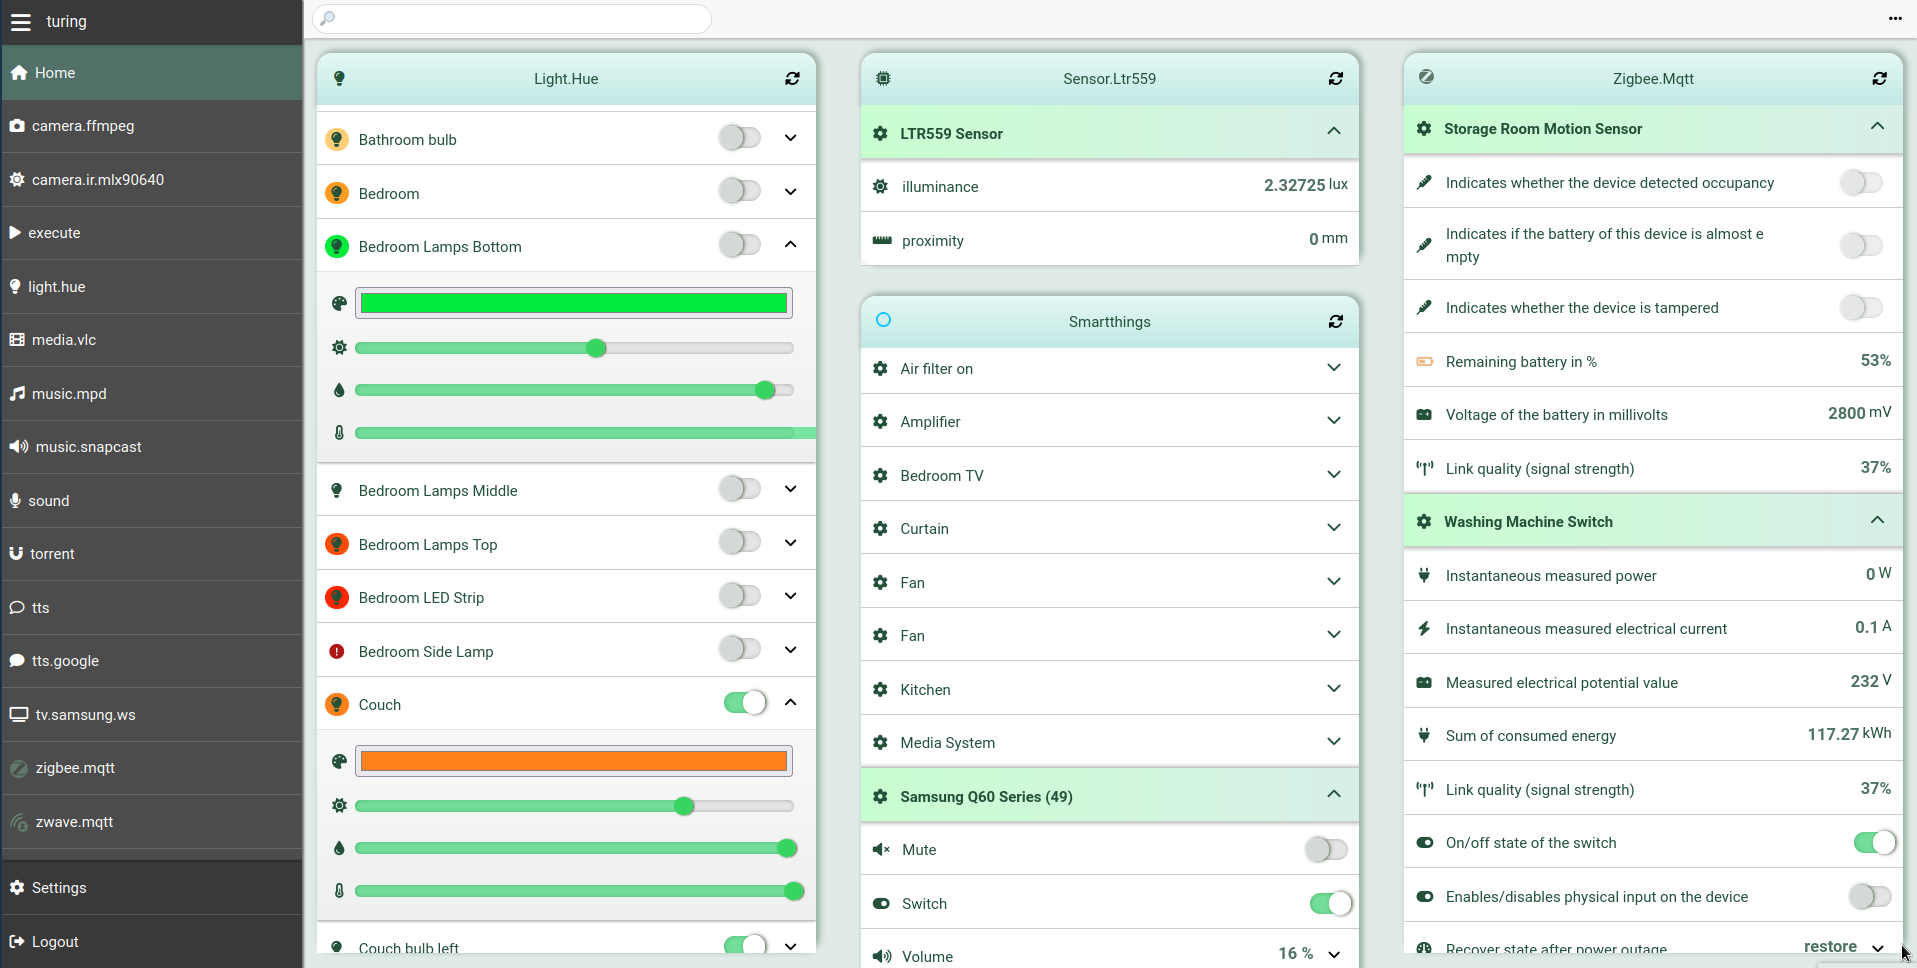
The main web panel
This is the default panel available at http://<host>:<port> after
registration/login. It provides all the entities published by the integrations
under one view, with custom grouping and filtering options.
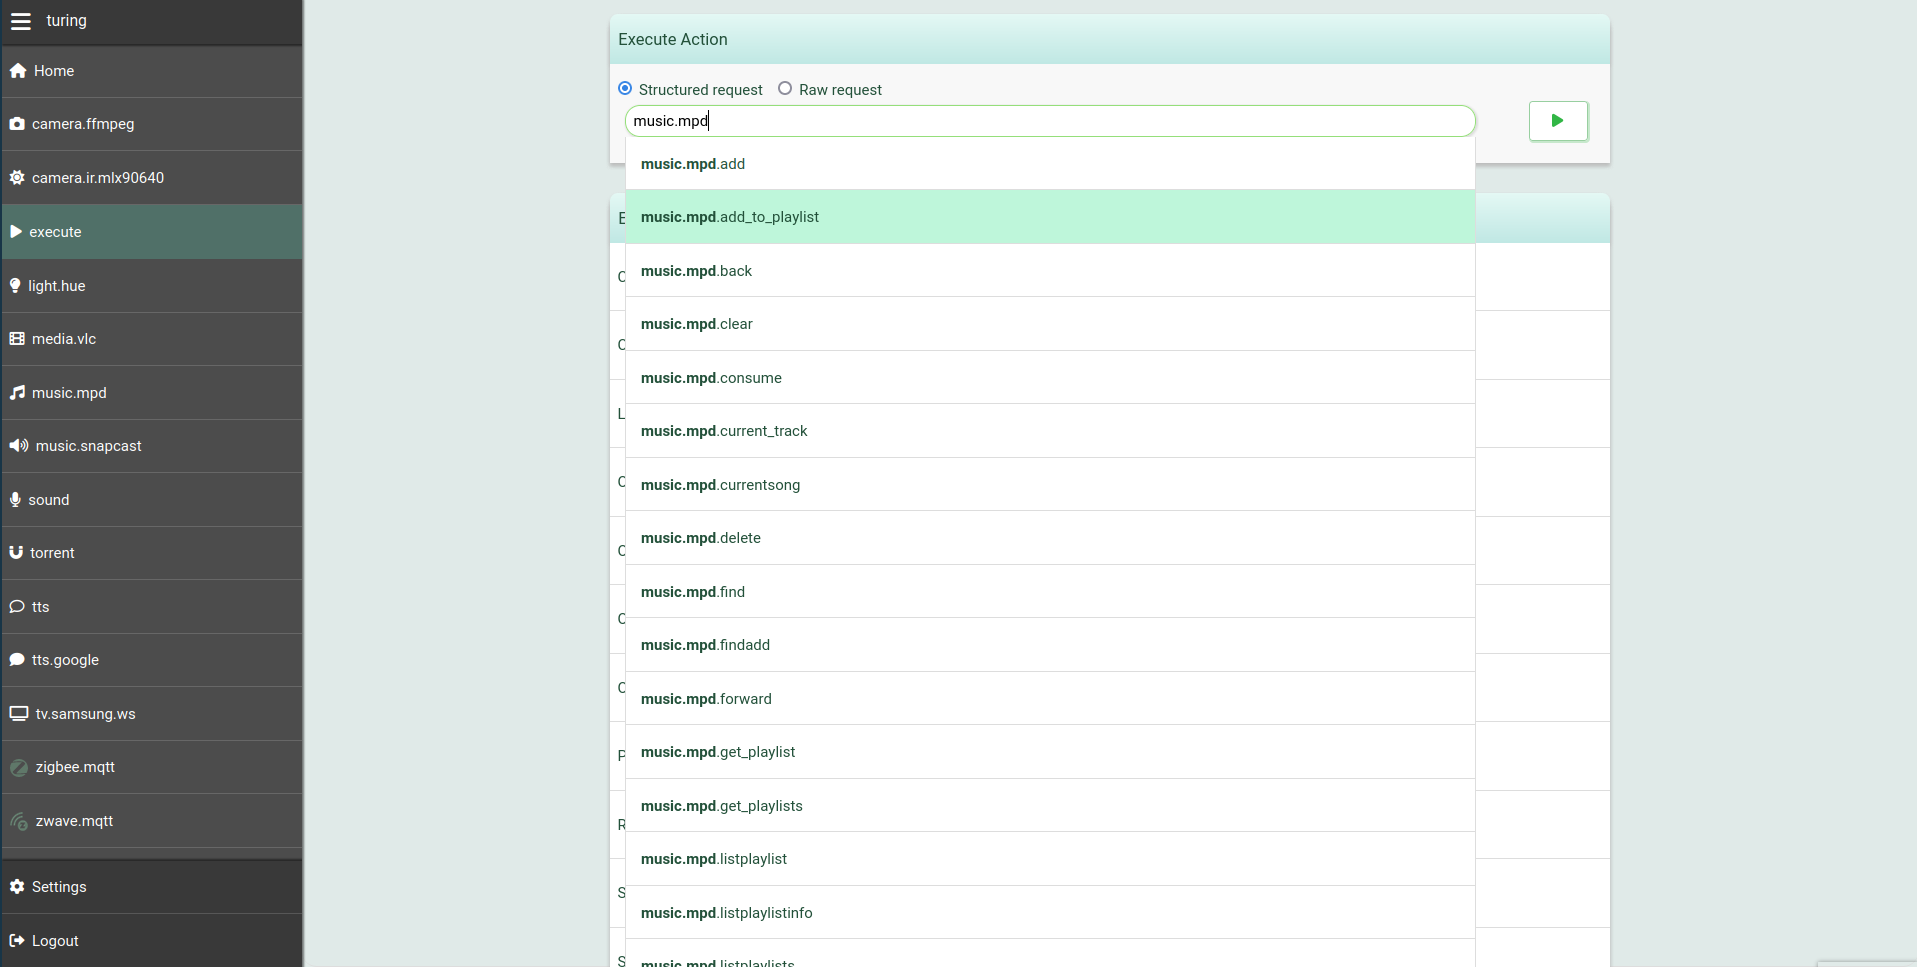
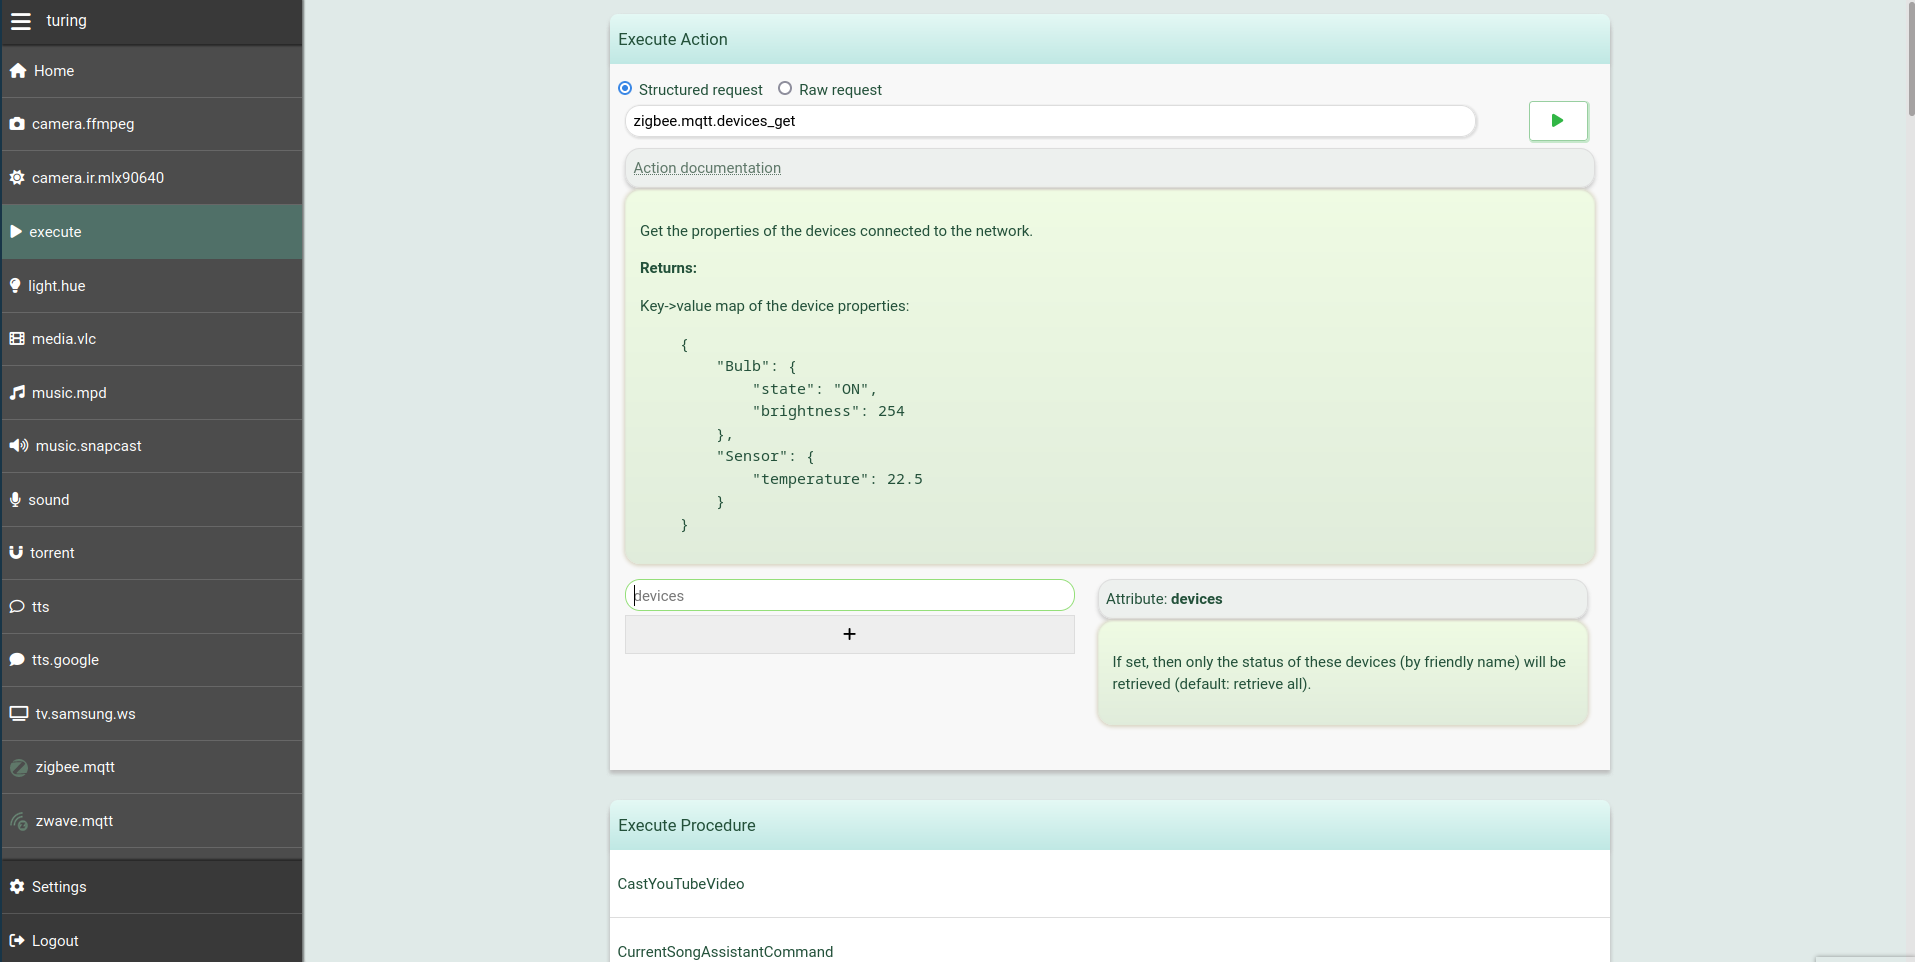
The execution panel
The web interface provides an execute panel as well. You can use this panel to
interactively inspect the available integrations and their actions, together
with their documentation and parameters, run requests directly from the web
interface, and inspect the JSON responses.
Other web panels
Several integrations add their own feature-rich panels to the web view, turning Platypush into a gateway to all of your services - from Zigbee sensors, to media players and services, to your music cloud, and more.
Dashboards
The web service also provides means for the user to create custom dashboards that can be used to show information from multiple sources on a large screen.
Running in production mode
If you want to access your Platypush web panel outside your home network, it may be a good idea to use an nginx/Apache reverse proxy with a valid SSL certificate (e.g. managed by certbot). A sample an nginx configuration is provided in the repository.
PWA support
Note that having the web application served over SSL is a requirement for the PWA (progressive web app) to work. The Platypush PWA allows you to install a Platypush native-like client on your mobile devices if you don't want to use the full Android app.
Mobile app
An official Android app is provided on the F-Droid store. It allows to easily discover and manage multiple Platypush services on a network through the web interface, and it easily brings the power of Platypush to your fingertips.
Tests
To run the tests simply run pytest either from the project root folder or the
tests/ folder.
Funding
If you use and love Platypush, please consider buying me a coffee/beer.
I've been working on Platypush all by myself in my spare time for the past few years, and I've made sure that it remains open and free.
If you like this product, please consider supporting - I'm definitely not planning to get rich with this project, but I'd love to have at least the costs for the server covered by users.
Issues and requests opened by donors will also be given priority over others.


