- Vue 63.2%
- JavaScript 32.4%
- SCSS 3%
- HTML 1.4%
| examples | ||
| scripts | ||
| src | ||
| .babelrc | ||
| .eslintrc.js | ||
| .gitignore | ||
| .gitmodules | ||
| .prettierrc | ||
| jsconfig.json | ||
| LICENSE | ||
| package-lock.json | ||
| package.json | ||
| README.md | ||
| webpack.config.js | ||
Platypush browser extension
This extension allows you to run Platypush commands on remote hosts as well as custom scripts, build custom actions as scripts that can access both the browser API and Platypush API, and attach hooks to events generated by remote Platypush systems.
Article on the motivations behind this extensions and some examples to get started: https://blog.platypush.tech/article/One-browser-extension-to-rule-them-all
This extension is not meant to be used as a standalone browser extension, but rather as a companion to the Platypush server.
It is meant to be used in conjunction with the Platypush server, which provides the backend functionality and APIs that the extension relies on.
Note: this extension is currently only compatible with Firefox, as it relies on permissions only available on Manifest V2 - now unsupported on Chromium-based browsers.
Installation
Official releases
The official version is available on the Firefox Add-ons store.
Manual installation
Install the dependencies:
npm install
Generate the extension .zip file:
npm run build-zip
Open about:debugging#/runtime/this-firefox in Firefox, click on "Load
Temporary Add-on" and select the generated .zip file - it should be located
under the dist-zip directory.
Dev installation
npm run build:dev
Testing
npm run watch:dev
Then follow the procedure for manual installation above to load the extension in Firefox. Any changes to the source files will be automatically picked up.
Configuration
Once installed, click on the popup icon in the browser toolbar and configure your Platypush service.
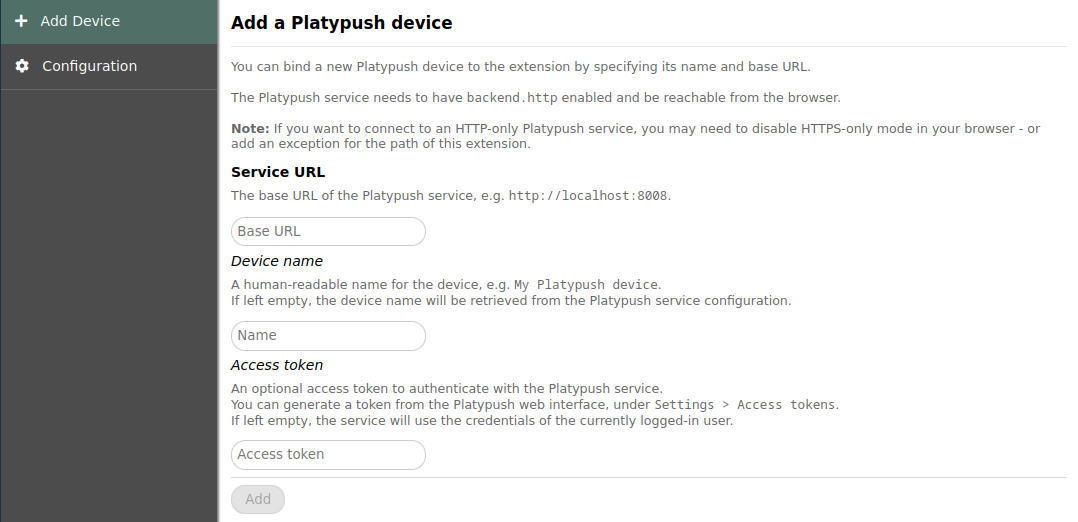
Authentication
You have two options to authenticate:
-
You can use a Platypush API token, which you can generate in the Platypush web interface. This is probably more portable and reliable, as it does not require you to log in to the Platypush web interface in the browser, and the extension won't stop working if you log out of the web interface.
-
You can just enter the URL of your Platypush server and log in with your username and password.
Backup and restore
You can backup your configuration directly to one of your remote Platypush hosts by clicking on the "Backup" button in the configuration tab.
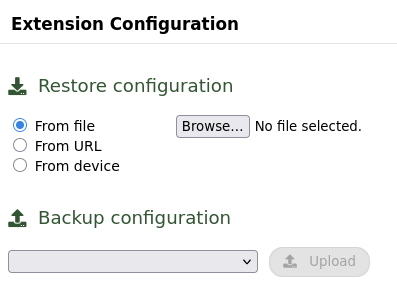
The configuration file will automatically be backed up under
<WORKDIR>/webext/config.json (usually
~/.local/share/platypush/webext/config.json).
From the configuration tab you can also restore the configuration from a remote host, a URL or a local file.
It is also possible to manually modify the configuration JSON, if you know what you are doing.
Usage
Once you have your extension configured, you can use it to run commands on your Platypush services directly from the browser.
It also provides a native JavaScript API that you can use to run more complex commands, or also to run commands that run entirely in your browser - similar to what e.g. GreaseMonkey/TamperMonkey do.
Running and storing actions
Select one of your configured devices and click the "Run Action" button to run a command on it.
You'll have a nice autocomplete form to help you find the command you want to run (your custom defined procedures will also be available in the list), as well as documentation about the command and its parameters.
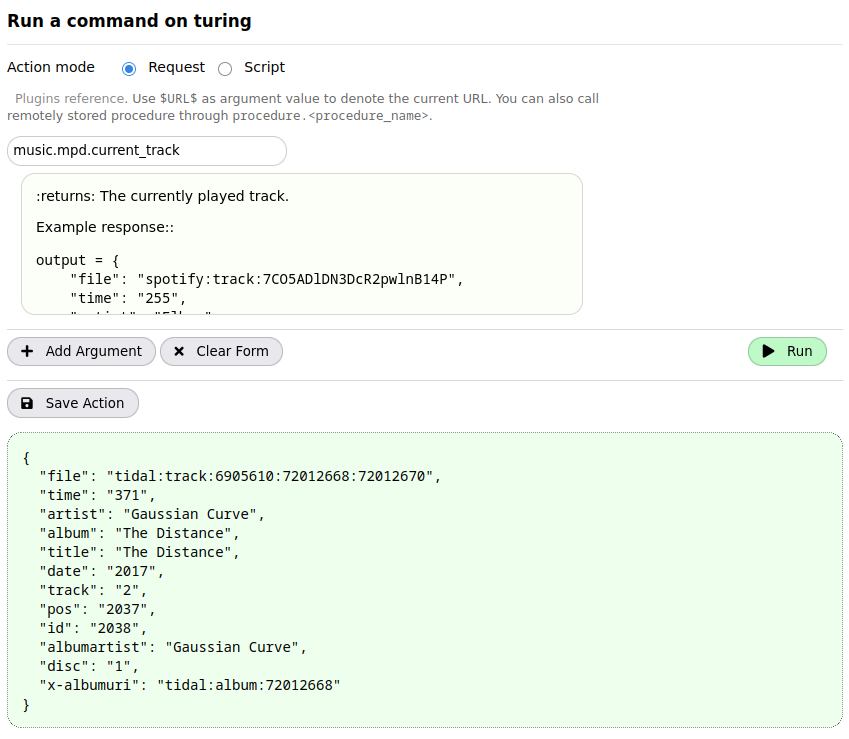
Click on Run to execute the command, or on Save Action if you want to save it to in your list.
The save action form will let you define a name for the action, a description, an icon (it supports FontAwesome classes), an icon color, a category, a list of devices (actions can be installed on multiple devices), and, quite importantly, a keybinding that can be used to run the action anywhere in the browser.

I personally find the keybinding the feature of this extension that I use the most.
While it's possible to run actions from the extension popup or the right click,
I find it very convenient to map the 10 actions I use the most (lights and
music control, save the current web page to Wallabag etc.) to the
Ctrl+Alt+<0-9> keys, so that I can run them from anywhere in the browser.
Script mode
The Request mode is the most straightforward way to run commands directly on your Platypush services, but you can also configured more complex actions by leveraging the Script mode in the Run tab.
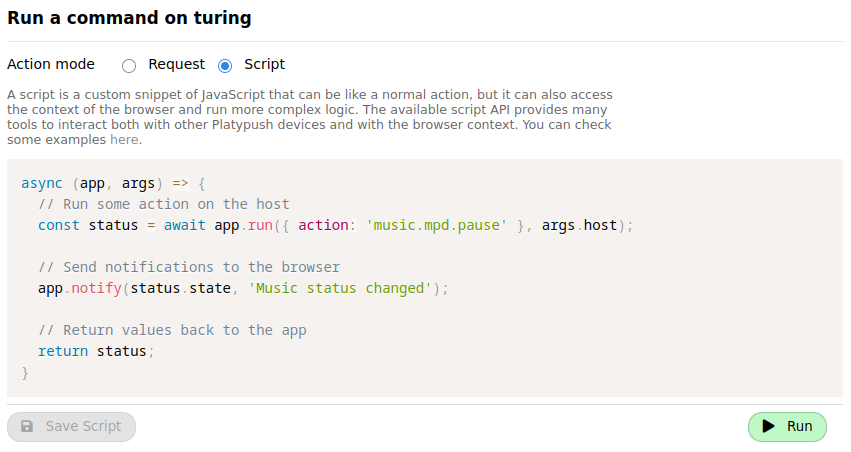
In this mode you can write a JavaScript async callback that will be run
when the action is executed.
The callback will receive two arguments:
app: an object that provides access to the Platypush API, which you can use to run commands on your Platypush services.args: an object that contains the parameters passed to the action when it was run.
The app object exposes many useful methods that you can use to run commands,
access the browser API, and more. A comprehensive example is available
here.